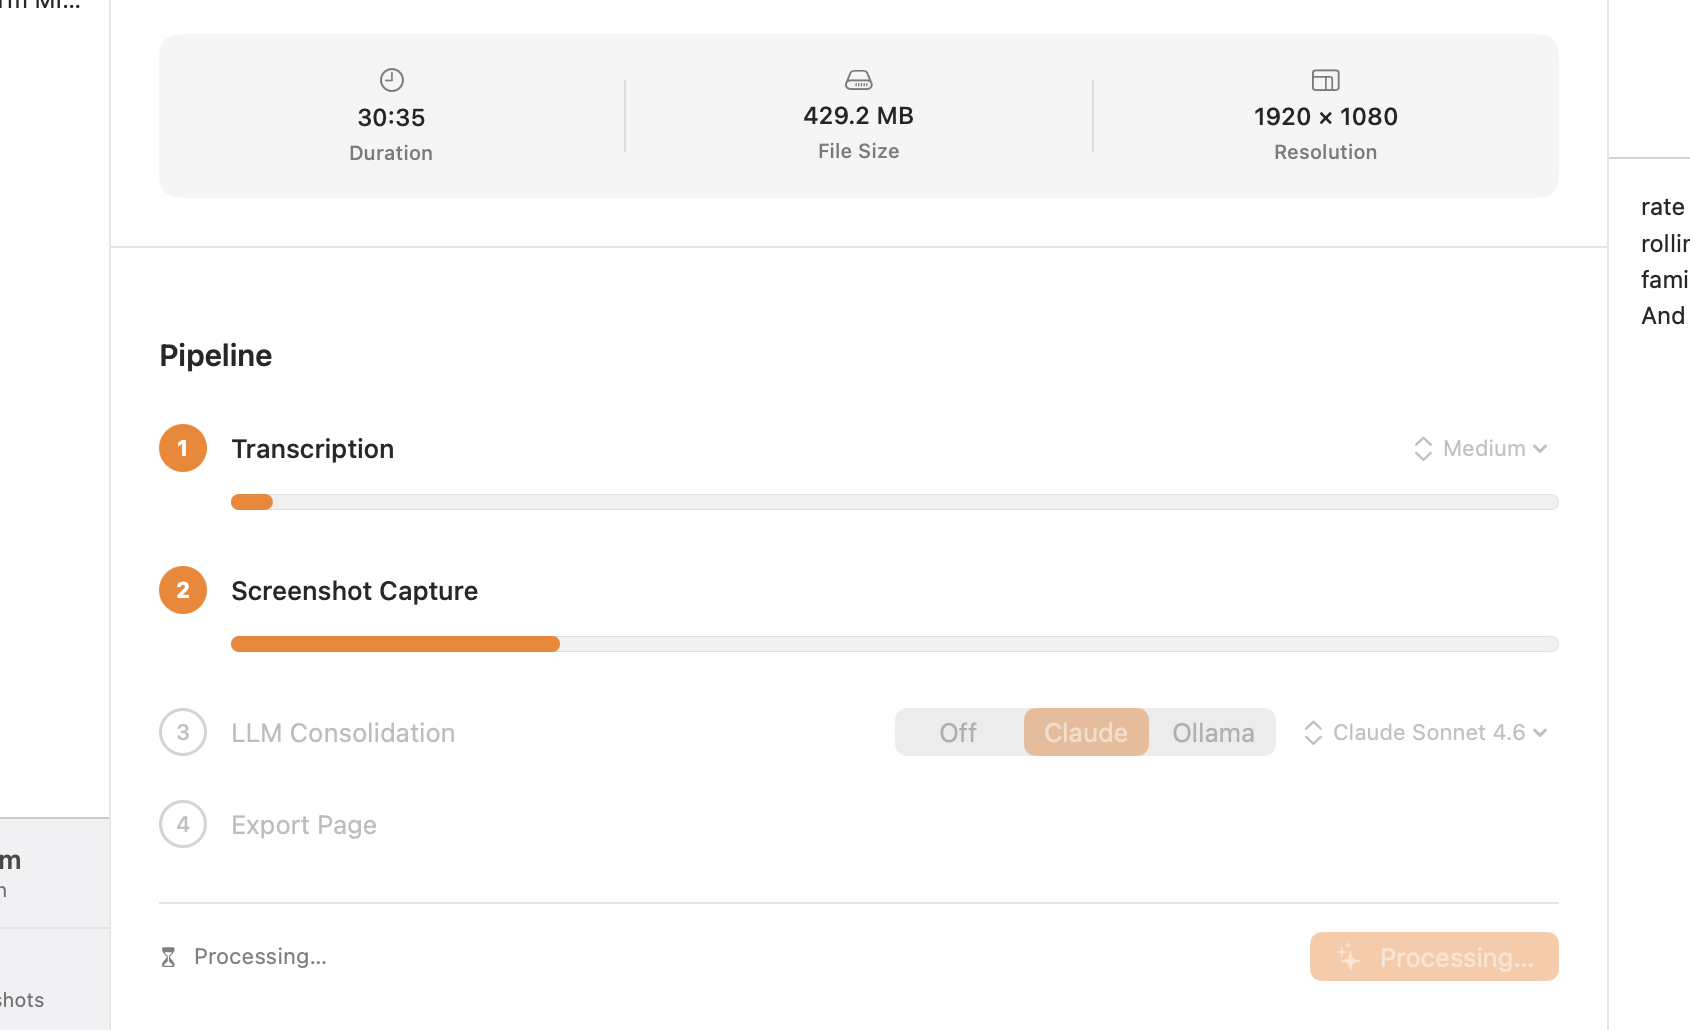
The Processing Pipeline
Four steps that turn a raw video into a polished, interactive study document. Steps 1 and 2 run in parallel; steps 3 and 4 run sequentially after.
Overview
When you click Begin Processing, Harvestry runs four stages:
- Transcription — WhisperKit transcribes the audio track using the Apple Neural Engine, producing word-level timestamped segments.
- Screenshot Capture — An on-device scan uses Apple Vision text detection, accurate OCR, and perceptual hashing to find every distinct slide, remove near-duplicates, and capture the sharpest frame of each at full resolution.
- LLM Consolidation — Optionally, the transcript is sent to Claude or a local Ollama model to generate structured study notes. Can be skipped.
- Export Page — Everything is assembled into a self-contained HTML folder:
index.html,styles.css,audio.m4a, and animages/directory.
Steps 1 and 2 run in parallel because they use different hardware — the Apple Neural Engine for transcription and the GPU/Video Toolbox for frame extraction. On most lectures this means you wait only as long as the slower of the two, not the sum of both.
Starting the Pipeline
Select a lecture in the sidebar that has Ready or Complete status. In the detail view, click the green Begin Processing button in the toolbar. The button disappears once processing starts and is replaced by a cancel button.
You can navigate away from the lecture while it processes — the pipeline continues in the background. The sidebar will update the status badge as each step completes.
Step 1: Transcription
Harvestry uses WhisperKit, an on-device implementation of OpenAI's Whisper model, to transcribe the audio track. Key characteristics:
- Runs entirely on the Apple Neural Engine — not the CPU, not a remote server.
- Produces word-level timestamps, enabling the per-word audio highlight sync in the exported HTML.
- Output language is auto-detected, but Whisper works best with content primarily in one language.
- No audio data leaves your Mac.
Five model sizes are available — Tiny, Base, Small, Medium, and Large Turbo — ranging from ~75 MB to ~800 MB. Larger models are more accurate but slower and require more memory. See Transcription for the full comparison table and download instructions.
Step 2: Screenshot Capture
Screenshot capture runs in two phases:
- Scan phase — The video is decoded at 640×360 / 2 fps. Each frame is assessed by a coverage-based change metric, Apple Vision text detection, and a de-duplication check that decides whether the moment is a genuinely new slide. Slides are de-duplicated by their OCR'd text; talking-head shots are de-duplicated by a perceptual fingerprint, so the recurring shot of the speaker collapses to a single representative. This produces a list of candidate timestamps.
- Capture phase — For each candidate, a short forward window is scored for sharpness and the fully-settled, sharpest frame is decoded at full resolution (up to 2560×1440). Near-black fade frames are discarded.
Both phases use the GPU and video decoder via Apple's AVFoundation framework and run in parallel with transcription on the Neural Engine — and every analysis stage (Vision, OCR, hashing) runs entirely on-device.
See Screenshot Capture for details on slide selection, sharpness detection, the max interval setting, and manual frame capture.
Step 3: LLM Consolidation
Once the transcript is available, you can optionally send it to a language model to generate structured study notes. The mode selector on the Step 3 row has three options:
- Off — No LLM. The pipeline skips straight to export. This is the default.
- Claude — Sends the transcript to the Anthropic API. Requires an API key configured in Settings. Your transcript text leaves your Mac over HTTPS.
- Ollama — Sends the transcript to a locally running Ollama instance. Fully on-device. Requires Ollama to be installed and running with a compatible model.
See LLM Consolidation for setup instructions and prompt customization.
Step 4: Export
The final step assembles all outputs into a folder at your configured export location:
index.html— The study document.styles.css— Stylesheet.audio.m4a— Audio track extracted from the video viaAVAssetExportSession.images/— JPEG screenshots, each named{index}_{timestamp}.jpg.
See HTML Export for the full page layout, audio sync, and annotation export details.
Monitoring Progress
During processing, the detail view shows four step rows with progress bars. The Transcript Panel on the right switches to a live log view, showing timestamped messages as the pipeline runs — useful for understanding what's happening or diagnosing an issue.
Progress fractions are approximate; they reflect how much of the video has been processed, not wall-clock time remaining.
After Completion
When all four steps complete:
- All step rows turn green with checkmarks.
- The sidebar status badge changes to a green Complete indicator.
- The toolbar shows two new buttons: Open in Browser and Show in Finder.
- The transcript panel switches from the log view to the transcript content view.
Re-processing Options
After a lecture is complete, you have several options to update or redo work:
| Action | What it does | Keeps screenshots? | Keeps transcript? |
|---|---|---|---|
| Reexport | Regenerates the HTML folder from existing transcript and screenshots. Use after adding annotations or changing export settings. | Yes | Yes |
| Retranscribe | Runs only transcription again (e.g. with a different Whisper model), then re-exports. Screenshots are preserved. | Yes | Replaced |
| Reprocess | Runs all four pipeline steps from scratch. Use when you want a completely fresh result. | Replaced | Replaced |
These options are available from the ⋯ overflow menu in the detail view toolbar, or by right-clicking the lecture in the sidebar.